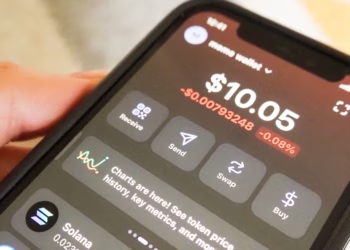
If you want to buy, store, or trade cryptocurrencies, the very first tool you need is a crypto wallet. A wallet is where you keep your digital assets safe, whether you’re an active trader or a long-term investor. Setting one up may seem complicated at first, but with the right steps, it’s straightforward and secure.
In this guide, you’ll learn the different types of wallets, how to set one up step-by-step, and key security practices every crypto user should follow.
Table of Contents
ToggleRelated posts
What Type of Crypto Wallet Should You Use?
Before you set up your first wallet, it’s important to understand the main options available.
- Hot Wallets (Software/Web): These are always connected to the internet. They come as mobile apps, browser extensions, or desktop programs. They’re convenient for everyday use, but more exposed to hacks.
- Cold Wallets (Hardware/Paper): These store your keys offline, making them nearly immune to online attacks. Hardware wallets like Ledger or Trezor are the most popular choice for long-term storage.
- Custodial vs. Non-Custodial: Custodial wallets (offered by exchanges) manage your keys for you, but that means less control. Non-custodial wallets give you full ownership of your private keys — along with full responsibility for keeping them safe.
Step-by-Step Setup Guide
1. Choose Your Wallet
Start by choosing the right wallet based on your needs.
- If you want quick access to DeFi apps and NFT marketplaces, go for a hot, non-custodial wallet like MetaMask or Trust Wallet.
- If you’re focused on security and long-term storage, a hardware wallet is the best choice.
2. Download or Acquire the Wallet
- For hot wallets: Download the official app or browser extension from the provider’s website or app store. Double-check URLs to avoid phishing scams.
- For hardware wallets: Buy directly from the manufacturer or authorized resellers. Never purchase second-hand devices.
3. Initial Configuration
Once installed or unboxed, create a new wallet.
- Set a strong, unique password.
- The wallet will generate a seed phrase (12–24 words) that acts as your ultimate recovery key.
4. Back Up Your Recovery Phrase
This step is critical. Write your seed phrase on paper or engrave it on a metal backup. Store it offline, away from cameras, cloud drives, or screenshots. If someone gains access to your seed phrase, they can take your funds instantly.
5. Fund Your Wallet
To start using your wallet, you’ll need to add crypto. Copy your public address (never your private key) and send funds from an exchange or another wallet. Always test with a small transaction first.
6. Enable Extra Security Features
Some wallets offer additional layers of protection, such as:
- PIN codes
- Biometric authentication
- Hardware security integration
Enable as many as possible for maximum protection.
Wallet Types at a Glance
| Wallet Type | Ease of Setup | Security Level | Best For |
| Custodial (Exchange) | Very Easy | Low | Beginners, quick trading |
| Hot Non-Custodial (App/Ext) | Easy | Medium | DeFi, NFTs, daily transactions |
| Cold Wallet (Hardware) | Moderate | High | Long-term storage, large funds |
Final Security Tips
Setting up a wallet is only the beginning. To keep your crypto safe:
- Never share your seed phrase with anyone.
- Store backups in multiple secure locations.
- Keep your wallet software and device firmware updated.
- Verify official URLs and apps before downloading.
Remember, in crypto you are your own bank. The security of your assets depends entirely on how carefully you manage your wallet.


